
Formula details
Product Details
Overview
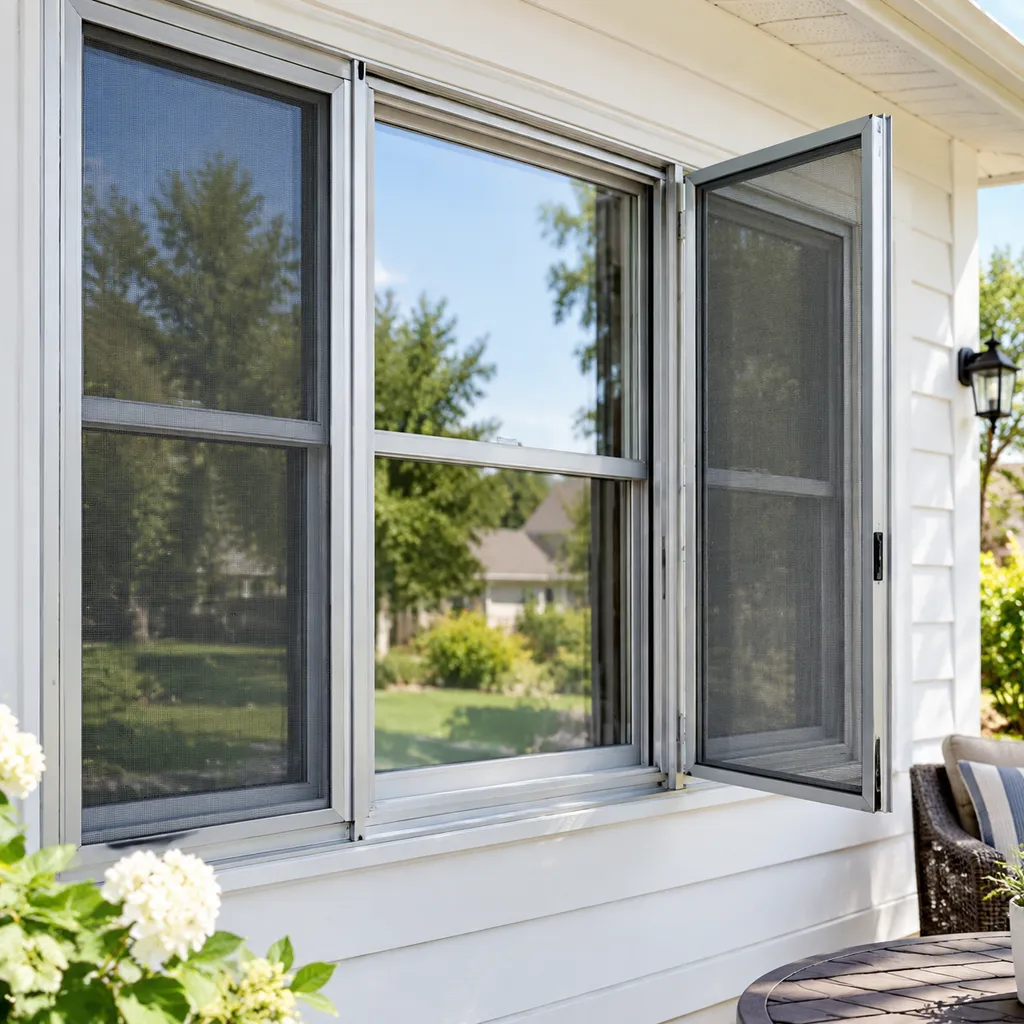
Types and Configurations of Aluminum Storm Windows with Screens
Triple-Track vs. Two-Track Aluminum Storm Window Systems
The track configuration determines how the glass panels and screens for aluminum storm windows operate inside the master frame:
-
- Triple-Track Aluminum Storm Windows: Feature three independent tracks holding two glass sashes and one full-width screen insert. All components are self-storing and slide vertically on their own dedicated channels. You can slide the bottom glass panel up and lower the screen for instant airflow without removing any parts.
- Two-Track Storm Windows: Utilize an outer track that houses the top fixed glass pane and an inner track that holds the operating bottom glass sash along with the screen. To allow airflow, the lower glass sash slides up while the screen rests securely at the sill level.
| Feature | Triple-Track System | Two-Track System |
|---|---|---|
| Sash Operation | Both glass panes and screen move independently | Top glass is fixed; bottom sash moves over screen |
| Ventilation | Top, bottom, or split ventilation | Bottom ventilation only |
| Maintenance | All inserts self-stored year-round | Screen stays in lower track or requires seasonal removal |
| Best For | Double-hung primary windows requiring flexible venting | Budget-conscious installations and single-hung windows |
Self-Storing vs. Interchangeable Glass and Screen Inserts
-
- Self-Storing Systems: Keep both the glass panels and the screen housed inside the heavy-duty aluminum frame year-round. We recommend this setup for zero-maintenance seasonal transitions—simply slide the glass open when fresh air is needed.
- Interchangeable Inserts: Use removable full-frame glass storm panels that you manually swap out for screens in the spring. These provide a lower profile and a traditional look, making them ideal for historic restorations.
Exterior vs. Interior Aluminum Storm Window Mounting Styles
-
- Exterior Mount: Fastened directly onto the exterior blind stop casing of the window frame. They create a protective thermal barrier that shields original wood or vinyl sills from rot, wind-driven rain, and UV damage.
- Interior Mount: Installed from inside the living space directly against the interior trim. This configuration is engineered for multi-story buildings, apartments, and historic properties where exterior architectural changes are restricted by local building codes.
Horizontal Sliders and Custom Architectural Shapes
-
- Horizontal Sliders (Two-Lite and Three-Lite): Designed for sliding primary windows and wide openings. Panels glide smoothly left to right on nylon rollers with dedicated side-operating screen inserts.
- Custom Architectural Shapes: Precision-bent extruded aluminum frames engineered to match round-top, arched, cathedral, and trapezoid window headers without compromising thermal efficiency.
Key Benefits of Aluminum Storm Windows with Built-in Screens
Adding aluminum storm windows with screens to your home is one of the fastest ways to improve comfort, slash heating and cooling costs, and protect your primary windows without doing a costly, full-frame tear-out.
| Feature | Primary Benefit | Real-World Impact |
|---|---|---|
| Low-E Glass Coating | Reflects radiant heat | Up to 15–30% drop in annual heating/cooling costs |
| Integrated Screen Tracks | Instant fresh air access | Keeps bugs out while letting air flow freely |
| Dead Air Buffer Zone | Acoustic dampening | Noticeable reduction in street noise |
| Exterior Metal Barrier | Weather & UV shielding | Prevents wood rot and paint peeling on primary sills |
Lower Energy Bills and Draft Reduction with Low-E Glass
Old single-pane windows leak conditioned air quickly. Installing exterior aluminum storm windows with screen assemblies creates a dead-air space between the primary glass and the storm panel. This pocket acts as a thermal buffer that drastically cuts air infiltration.
When you choose panels with low-E glass coatings, the window reflects interior heat back into your rooms during winter and blocks solar heat gain during summer. Understanding how aluminum storm windows prices and performance factors align will help you see that these low-e options often pay for themselves within just a few heating seasons through substantial draft reduction.
Year-Round Bug Protection and Easy Seasonal Ventilation
With built-in screens for aluminum storm windows, switching between sealing your home and letting in fresh air takes seconds.
-
- Triple-track convenience: In modern triple-track systems, the screen sits in its own dedicated track. You can slide the lower glass panel up and engage the screen without removing or storing bulky frames in the garage.
- Tight insect seal: Heavy-duty wool pile weatherstripping along the screen frame blocks gnats, flies, and mosquitoes while preventing frame rattling during high winds.
Outside Noise Reduction
Single-pane units do very little to dampen street noise. Adding an exterior aluminum storm window creates a secondary barrier that disrupts sound waves. The combination of two separate glass panes and an insulating air gap significantly reduces traffic noise, barking dogs, and neighborhood commotion, making indoor living spaces noticeably quieter.
Shielding Historic Wood and Vinyl Sills from Weather Rot
Exposed exterior wood sills face constant abuse from rain, snow, hail, and harsh UV rays. Over time, moisture penetration leads to peeling paint, wood rot, and structural frame failure.
A heavy-duty aluminum frame deflects driving rain and harsh sunlight away from the primary window. Built-in, properly sloped weep holes allow any trapped condensation to drain outward instantly, keeping your original wood sills bone-dry and preserving the architectural character of historic openings for decades.
Choosing the Best Screen Mesh for Aluminum Storm Windows
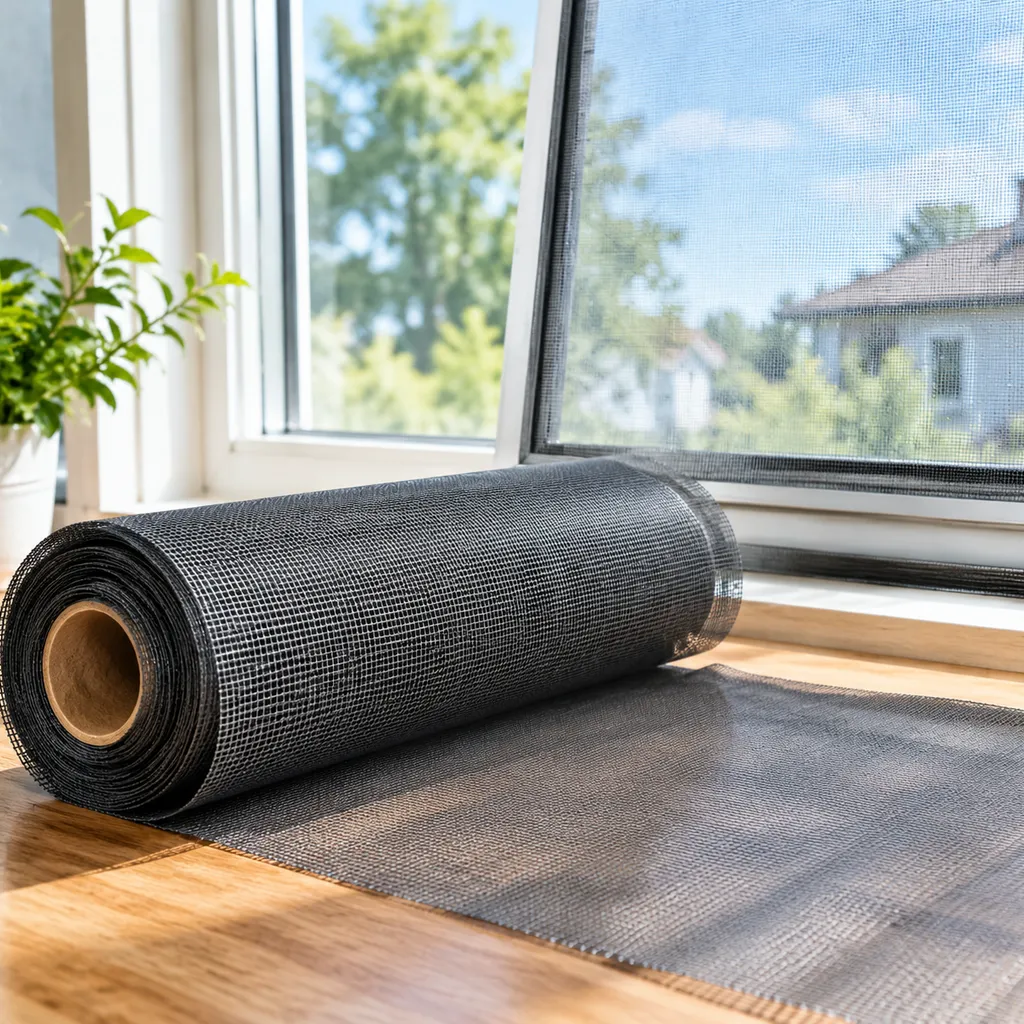
Selecting the right mesh for screens for aluminum storm windows directly impacts airflow, visibility, durability, and pest control. We work with several screen materials depending on home location, climate, and daily use.
Fiberglass vs. Aluminum Wire Screen Mesh
The two most common choices for storm window inserts are standard fiberglass and traditional aluminum wire.
| Feature | Fiberglass Window Screen Mesh | Aluminum Wire Mesh Screen |
|---|---|---|
| Durability | Flexible; won’t dent or crease | Rigid; can dent upon hard impact |
| Corrosion Resistance | 100% rustproof and rot-proof | Resists rust, but can corrode in salty coastal air |
| Visibility & Light | Good outward visibility, non-glare | Excellent clarity, slight metallic sheen |
| Cost | Budget-friendly | Slightly higher initial cost |
| Best For | General residential use | Historic homes requiring traditional metals |
-
- Fiberglass Mesh: Woven from glass yarn and coated with protective vinyl. It does not crease when bumped and installs easily into high-quality aluminum storm windows without complex tools.
- Aluminum Wire Mesh: Sturdier against direct clawing or physical pressure, making it a reliable standard for double-hung exterior units.
High-Durability Pet Screens and Solar Heat-Blocking Mesh
For specialized household needs, upgrading the mesh on aluminum storm windows with screens provides targeted protection:
-
- Pet-Resistant Screens: Made from heavy-gauge, vinyl-coated polyester yarn. These screens are up to seven times stronger than standard fiberglass, preventing tears from cat claws, dogs, and active children.
- Solar Control Mesh: Blocks up to 65%–90% of direct solar heat gain and UV rays before it hits the primary window glass. This reduces room cooling loads and prevents indoor furniture fading while maintaining outside visibility.
Micro-Mesh Options for Tiny Gnats and No-See-Ums
Standard 18x16 mesh weaves keep out flies and mosquitoes, but coastal and marsh regions often deal with tiny biting insects.
-
- 20x20 Micro-Mesh: Uses a tighter weave count to block tiny no-see-ums, gnats, and sand fleas.
- Airflow Balance: While micro-mesh filters out microscopic pests and additional airborne pollen, it slightly reduces natural cross-breeze compared to standard weave profiles.
Frame Color Matching for Storm Window Screens
Matching the screen frame finish to your window trim ensures a clean, unified exterior facade. We fabricate and supply replacement screen frames in four standard durable finishes:
-
- Mill Finish: Raw, unpainted silver aluminum suitable for utility areas or vintage architectural matching.
- White Powder Coat: Baked-on polyurethane finish that resists chipping and UV fading on light trims.
- Bronze: Dark architectural tone tailored for dark brown, wood-toned, or earthy exterior casings.
- Anodized Aluminum: Chemically hardened surface layer that offers top-tier corrosion resistance in harsh, coastal environments.
How to Measure Window Openings for Aluminum Storm Windows and Screens
Measuring Width and Height Inside the Blind Stop Casing
Exterior aluminum storm frames mount directly against the outer window trim, known as the blind stop. To ensure an airtight fit for our heavy-duty aluminum windows, we measure between the inside faces of these stops:
-
- Width: Measure horizontally between the inside edges of the blind stop molding. Take three separate measurements: across the top, middle, and bottom. Record the smallest of the three numbers.
- Height: Measure vertically from the highest point of the sloped bottom sill (where the sill meets the blind stop) up to the underside of the top blind stop header. Take measurements at the left side, center, and right side. Again, record the smallest dimension.
- Depth Check: Verify that your blind stop casing has at least 3/4-inch to 1-inch of flat mounting depth to support the screw flange of the storm master frame.
Checking Opening Squareness and Sill Slope Angles
Older homes settle over time, turning square openings into subtle parallelograms. Installing a rigid aluminum frame into an out-of-square opening leads to stuck screen tracks and sash rattle.
-
- Diagonal Check: Measure diagonally from the top-left corner to the bottom-right corner, then from the top-right corner to the bottom-left corner. If the two diagonal numbers differ by more than 1/4 inch, the opening is out of square and will require shimming or adjustable expanders.
- Sill Slope Inspection: Most traditional window sills pitch downward at an angle of roughly 10 to 14 degrees to shed water. We always check that the sill has a consistent slope and is free of rotting wood, peeling paint, or heavy caulking residue before finalizing our frame specifications.
Measuring Existing Frames for Replacement Screen Inserts
If your main aluminum master frame is in good condition and you only need screens for aluminum storm windows, measuring the screen insert itself requires a different approach:
| Measurement Point | How to Measure | Notes |
|---|---|---|
| Insert Width | Measure the outer edge to outer edge of the existing screen frame channel. | Measure across top and bottom; use the exact width down to 1/16". |
| Insert Height | Measure from the very top rail of the screen insert to the bottom rail. | Include corner key margins; do not include flexible tension springs. |
| Frame Thickness | Measure the depth profile of the screen frame rail (standard is 5/16", 3/8", or 7/16"). | Ensures the insert slides smoothly inside hung window storm tracks. |
If the original screen insert is missing entirely, measure the inside width between the storm frame's screen channels, then subtract 1/8 inch for side-to-side clearance. Measure the height from the bottom rest stop to the center meeting rail, subtracting 1/8 inch for operating clearance.
Standard Off-the-Shelf Sizes vs. Custom Manufactured Aluminum Frames
Before ordering, determine whether your window openings match factory-standard dimensions or require custom fabrication.
-
- Standard Sizes: Stock aluminum storm units are built in 2-inch increments (such as 28" x 55", 32" x 55", or 36" x 63"). Standard units usually include an expandable bottom sill adapter (an expander) that drops down up to 1/2 inch to close the gap on sloped sills.
- Custom Manufactured Frames: Openings in historic homes or non-standard architectural builds rarely match stock dimensions. Custom-sized aluminum storm windows with screen assemblies ensure exact perimeter contact, preventing air infiltration around uneven casings without requiring bulky exterior fillers.
Step-by-Step Installation for Aluminum Storm Windows with Screens
Installing aluminum storm windows with screens is one of the most cost-effective exterior upgrades you can make to stop drafts and protect primary sashes. Proper installation ensures smooth track operation, prevents water intrusion, and maximizes thermal efficiency. Following proven window installation and maintenance methods ensures your storm units perform reliably season after season.
Primary Window Casing
[ CAULK TOP ] → TOP HEAD EXPANDER
[ C ] [ C ]
[ A ] [ A ]
[ U ] UPPER GLASS INSERT [ U ]
[ L ] [ L ]
[ K ] [ K ]
[ S ] LOWER GLASS / SCREEN [ S ]
[ I ] TRACK (Self-Storing) [ I ]
[ D ] [ D ]
[ E ] [ E ]
=== BOTTOM EXPANDER SILL ===
(NO CAULK / CLEAR WEEP HOLES)
[ WEEP HOLE ] [ WEEP HOLE ]
WINDOW SILL NOSE
Essential Tools, Sealants, and Primary Frame Prep
Before setting the unit into place, proper preparation of the exterior blind stop and window frame prevents air leaks and structural rot.
- Required Tools: Cordless drill/driver with clutch control, #2 Phillips bit, level, tape measure, utility knife, heavy-duty caulking gun, and non-marring pry tool.
- Sealants & Fasteners: High-grade exterior neutral-cure silicone or elastomeric sealant, plus 1-inch #6 or #8 zinc-plated or stainless steel pan-head screws.
- Frame Preparation:
- Scrape off peeling paint, old caulking beads, and dirt from the blind stop stops.
- Inspect the wood sill for rot; repair and seal any compromised areas before installation.
- Ensure the exterior window casing is dry, structurally sound, and clean.
Applying Silicone Caulk and Keeping Bottom Weep Holes Clear
Water drainage is the single most critical factor in exterior storm window installations. Improper caulking traps driven rain against your main window casing, causing hidden rot.
-
- The Inverted "U" Caulk Pattern: Apply a continuous, generous 3/8-inch bead of exterior-grade silicone caulk along the outer face of the top blind stop and down both side blind stops.
- Leave the Bottom Sill Unsealed: Never apply caulk to the bottom mounting flange.
- Protecting Storm Window Weep Holes: Aluminum master frames feature built-in drainage slots (weep holes) or bottom expander notches. Leaving the bottom uncaulked allows condensation and wind-driven rain to drain out freely onto the sloped sill.
Aligning the Aluminum Master Frame and Adjusting Top Expanders
A square, plumb frame ensures the screens for aluminum storm windows and glass sashes slide effortlessly without binding.
-
- Seat the Top Expander: Slide the top head expander onto the top of the aluminum master frame.
- Position the Unit: Rest the bottom expander flange on the sloped window sill, then tilt the top of the master frame firmly against the caulked side and top blind stops.
- Adjust the Head Expander: Push the top expander up tight against the top casing header to eliminate any air gaps before fastening.
- Verify Plumb and Square: Measure corner-to-corner diagonally to ensure the master frame is square, checking vertical rails with a 2-foot level.
Securing Mounting Screws Without Warping the Aluminum Frame
Over-tightening fasteners bends extruded aluminum channels, causing sash inserts to jam or rattle.
| Step | Action | Best Practice |
|---|---|---|
| 1. Top Anchor | Drive one screw into the top corner mounting slot on each side. | Do not fully tighten; leave 1/16-inch play for alignment. |
| 2. Square Check | Check diagonal measurements across the frame. | Shift the bottom left or right until both diagonals are identical. |
| 3. Center Fastening | Insert screws into the pre-punched side track holes. | Set the drill clutch low to avoid bowing the side tracks inward or outward. |
| 4. Bottom Expander Adjustment | Tap the bottom expander down with a wood block so it matches the sill angle. | Secure the bottom expander screws through the side slots. |
Testing Sliding Panels, Spring Latches, and Screen Tracks
Once the frame is fastened, thoroughly test all operational components of your aluminum storm windows with screens:
-
- Test Track Travel: Slide both the upper and lower glass inserts along with the built-in screen panel up and down through their full travel range.
- Engage Spring Latches: Confirm that the spring-loaded zinc or plastic corner latches snap firmly into the pre-punched adjustment notches along the master frame jambs.
- Check Track Clearance: If the screen insert or lower sash binds in the track, slightly back off the middle mounting screws on that side to release tension on the extruded track.
- Seal Inspection: Verify from the outside that the caulking bead made uniform contact around the entire top and side perimeter of the frame.
How to Repair and Replace Screens for Aluminum Storm Windows
Removing Jammed or Stuck Screen Panels from Aluminum Tracks
Screens often get wedged in their channels due to grit buildup or warped metal. To remove a stubborn panel safely:
-
- Clear the track base: Vacuum out dried dirt, bug debris, and loose paint flakes along the lower track.
- Depress the side slide bolts: Retract both spring-loaded pins completely. If they are frozen, apply a light spray of dry silicone lubricant directly into the latch housing.
- Lift upward first: Push the screen panel straight up into the top header channel to compress the top tension springs.
- Angle the bottom out: Once the bottom frame clears the lower retaining lip, swing the bottom toward you and lower the insert out of the master frame.
Replacing Broken Corner Keys, Tension Springs, and Lift Tabs
Sun exposure and age make small plastic components brittle. Replacing these parts keeps your replacement storm window screens secure and rattle-free:
-
- Plastic and metal corner keys: If a frame corner splits, remove the old spline and mesh, tap the frame pieces apart using a rubber mallet, and slide a new matching corner key into the mitered channel.
- Leaf and coil tension springs: Insert replacement flat leaf springs into the side channel slots before reassembling frame corners to maintain outward pressure inside the window track.
- Nylon lift tabs: Position new pull tabs inside the spline groove along the bottom rail before locking the spline cord into place.
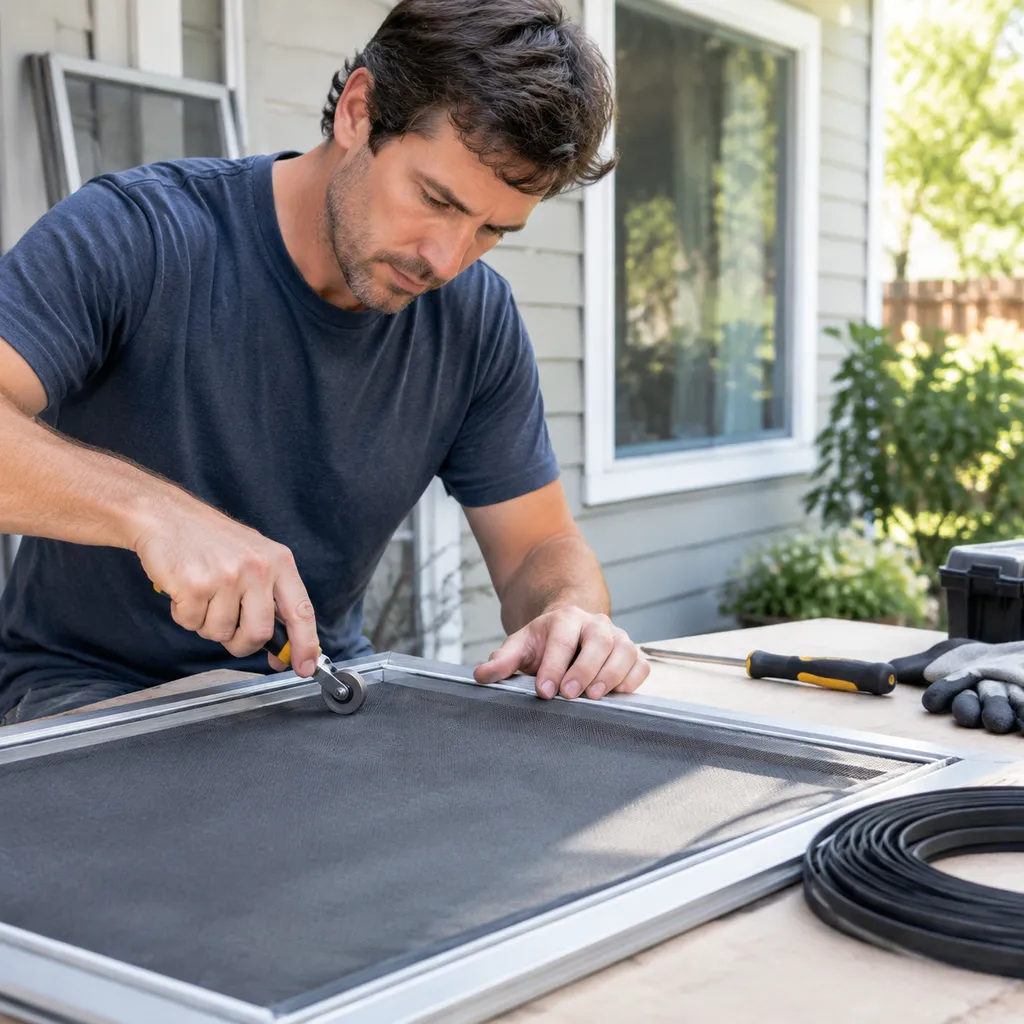
Step-by-Step Screen Resplining Without Bending the Aluminum Frame
Lightweight aluminum frames bend easily if you pull the mesh too tight during installation. Follow this process for flat, square results:
-
- Secure the frame: Clamp the empty aluminum frame to a flat work table using wood blocks along the outer edges to prevent inward bowing (hourglassing).
- Cut mesh to size: Lay new screen material over the frame, leaving roughly 1.5 to 2 inches of overhang on all four sides.
- Roll the spline in sequence: Start at a top corner. Using a convex rolling tool, press the round aluminum screen frame spline into the groove over the mesh. Work along the top first, then the sides, and finish at the bottom.
- Maintain light tension: Keep gentle, even tension with your free hand without yanking the mesh sideways.
- Trim the excess: Run a sharp utility knife along the outer edge of the spline groove at a 45-degree angle to slice away the excess mesh cleanly.
Upgrading Old Torn Mesh to Modern Heavy-Duty Screen Fabric
Standard mesh deteriorates over time, but you can upgrade your inserts during any routine rescreening:
-
- Heavy-gauge pet mesh: Vinyl-coated polyester mesh resists tears from claws and heavy impacts while fitting standard spline grooves.
- Solar-blocking screen fabric: Reduces incoming radiant heat and UV glare before it reaches your primary window glass.
- Standard charcoal fiberglass mesh: Flexible, rust-proof, and easy to roll into lightweight frames without distortion.
- Rigid aluminum wire mesh: Delivers maximum puncture resistance and stays taut across large, non-standard window profiles.
For unique architectural openings that require specialized framing beyond standard rectangular tracks, explore custom options like specialty shape windows to match specific structural requirements.
Care, Cleaning, and Seasonal Track Maintenance
Routine maintenance keeps your aluminum storm windows with screens operating smoothly and prevents drafts, metal corrosion, and jammed sashes. We recommend servicing your tracks and screen panels twice a year—once in spring before open-window season, and once in late autumn before freezing weather sets in.
Cleaning Aluminum Frame Channels, Weep Holes, and Screen Mesh
Dirt, pollen, and grit settle naturally into the lower tracks of triple-track aluminum frames, creating friction that grinds down aluminum edges and jams slide latches.
-
- Vacuum track channels: Use a shop vacuum with a narrow crevice attachment to lift loose dirt, dead insects, and dried leaves from the bottom rail channels.
- Wash the screen fabric: Remove the screens for aluminum storm windows and lay them flat on a clean surface. Scrub gently with warm water, mild liquid dish soap, and a soft-bristle nylon brush. Rinse thoroughly with a garden hose on a low spray setting to prevent stretching the mesh.
- Clear the bottom weep holes: Inspect the exterior bottom expander for drainage slots (storm window weep holes). Poke a thin cable tie, toothpick, or length of wire through each slot to clear trapped debris. Blocked weep holes trap water inside the sill casing, causing interior wood rot.
Best Dry Lubricants for Sticking Tracks (and Why to Avoid Grease)
When storm sash inserts or screens become difficult to slide, applying the wrong lubricant makes the problem significantly worse.
-
- What to avoid: Never use petroleum-based lubricants, standard WD-40, motor oil, or lithium grease. Wet lubricants attract airborne dust and road grime, forming a gritty abrasive paste that ruins aluminum guide channels.
- What to use instead: Apply a dedicated dry PTFE spray or dry silicone lubricant.
- Application method: Spray a light mist directly into the vertical side tracks. Slide the glass sash and screen up and down three to four times to distribute the coating across the slide tracks, then wipe off any overspray with a microfiber cloth. A block of paraffin wax rubbed along the track edges also works well as a mess-free alternative.
Preventing Aluminum Oxidation and White Rust in Humid Climates
Uncoated mill-finish aluminum frames react with moisture, road salts, and high humidity, forming a chalky white powder known as aluminum oxidation or white rust.
-
- Remove existing oxidation: Mix equal parts white vinegar and warm water. Scrub the corroded tracks and frame edges with a non-scratch scouring pad or fine bronze wool (never use regular steel wool, as it leaves behind rust-prone iron fibers).
- Rinse and dry: Wipe the area clean with a damp rag and dry the metal thoroughly.
- Seal the surface: Apply a thin coat of high-grade automotive paste wax or marine metal sealant to the exposed aluminum frame. Buff it dry to leave a protective barrier against moisture and atmospheric salts.
Pre-Winter Inspection Checklist for Maximum Draft Protection
Before cold weather arrives, walk through this quick checklist to ensure your aluminum storm windows with screen assemblies deliver full thermal efficiency:
-
- Reposition sashes: Slide the outer top glass sash fully up to the top header and lower the inner glass sash completely to the sill. Position the screen insert in the top-storage position on self-storing models.
- Engage latch pins: Check that both spring-loaded slide latches snap fully into their corresponding track index holes on both sides. Sashes that sit crooked leave gaps that let cold air bypass the frame.
- Inspect wool pile weatherstripping: Examine the fuzzy wool pile or vinyl fin seals along the sash meeting rails. Replace worn, crushed, or missing strips to stop cold drafts.
- Check frame perimeter seal: Look for cracked or separated exterior perimeter caulk around the top and side blind stops. Recaulk any gaps with exterior-grade polyurethane or silicone sealant while leaving the bottom weep openings clear.
Cost Comparison: Aluminum Storm Windows vs. Full Replacement Windows
Upgrading home efficiency does not always require tearing out entire frames. Installing heavy-duty aluminum storm windows with screen units over existing primary sash provides near-identical thermal performance to full replacements at a fraction of the total expense.
Average Unit Prices for Standard and Custom Models
-
- Standard off-the-shelf units: $90 – $180 per window (standard sizes, clear or tinted glass, integrated fiberglass mesh).
- Custom aluminum storm window replacement: $175 – $350 per unit (tailored dimensions, Low-E glass coatings, specialized finishes like bronze or black anodized).
- Full replacement windows: $450 – $1,200+ per opening (complete teardown, structural framing adjustments, and interior trim work).
| Feature / Factor | Aluminum Storm Windows with Screens | Full Window Replacement |
|---|---|---|
| Average Unit Cost | $90 – $350 | $450 – $1,200+ |
| Installation Labor | $35 – $75 per opening | $150 – $300+ per opening |
| Typical Payback Period | 4 to 6 years | 15 to 25 years |
| Expected Lifespan | 30 to 45+ years | 20 to 30 years |
| Primary Structural Disruption | Minimal (exterior mount) | High (siding and trim removal) |
DIY Installation Cost vs. Hiring a Contractor
-
- DIY Installation: Costs roughly $10 to $20 per window for high-grade exterior neutral-cure silicone caulk and stainless steel fasteners. Because master frames mount directly against existing blind stops, an experienced DIYer can mount a unit in under 45 minutes.
- Hiring a Professional: Adds $35 to $75 per window in labor. This ensures accurate leveling, plumb exterior fits, and balanced top expanders on out-of-square historical casings. If primary sills or frames are completely degraded, switching directly to durable and energy-efficient aluminum single-hung windows provides a clean, brand-new structural foundation instead.
Estimated Energy Savings and ROI Timeline
Adding screens for aluminum storm windows equipped with Low-E glass creates a dead-air insulating barrier that reduces household air infiltration by up to 80%.
Annual Heating & Cooling Savings: 12% to 30% reduction on utility bills.
Return on Investment (ROI): 4 to 6 years for aluminum storm panels, compared to over two decades for full vinyl or wood window overhauls.
Lifespan and Durability: Aluminum vs. Vinyl Storm Windows
-
- Aluminum Frames: Extruded aluminum does not warp, crack, or become brittle under direct UV exposure. It withstands extreme heat and freezing cycles, delivering a 30 to 45+ year service life with occasional track cleaning.
- Vinyl Frames: Lower initial cost, but prone to thermal expansion, track sagging, and cracking after 10 to 15 years in direct sun.
- Replacement Parts: Aluminum frames allow quick swap-outs for screen inserts, corner keys, and slide latches without needing to discard the master outer frame.
Frequently Asked Questions About Aluminum Storm Windows with Screens
Can You Add Low-E Glass to Aluminum Storm Windows with Screens?
Yes. Upgrading to Low-E glass in aluminum storm windows with screens significantly boosts thermal performance. Low-E coatings reflect radiant heat back inside during winter and block solar heat gain during summer. When paired with standard primary sashes or compact aluminum single hung windows, a Low-E storm panel delivers insulation levels close to double-pane replacement units at a fraction of the cost.
How Do You Get a Stuck Triple-Track Storm Screen to Slide Down?
Triple-track storm screens usually seize due to dirt buildup, dried paint, or misaligned tension latches. We recommend following these troubleshooting steps:
Clear debris: Vacuum the side tracks and clean out accumulated grit with an old toothbrush and mild soapy water.
Check spring latches: Push both side thumb latches inward simultaneously. If one side sticks, gently wiggle the frame to free the spring bolt.
Apply dry lubricant: Spray a PTFE dry lubricant along the track channels. Never use WD-40 or grease, as oil-based sprays attract dirt and worsen track binding.
Square the frame: If the sash binds midway, push gently upward and level the panel horizontally before pulling down.
Can I Replace Just the Screen Insert on an Old Aluminum Storm Window?
Yes. You do not need to replace the entire master frame if only the screen frame is bent or damaged. We custom-fit new screens for aluminum storm windows by measuring the exact height, width, and frame thickness of the existing insert channel. Standard replacement inserts use pre-installed corner keys, tension springs, and slide-in pull tabs for a drop-in fit.
Do Aluminum Storm Windows Cause Condensation on Interior Glass?
Aluminum storm windows do not cause interior condensation; high indoor humidity combined with cold outdoor temperatures does. However, poor exterior airflow can trap moisture:
Weep hole blockage: Ensure the bottom sill weep holes on your exterior aluminum frame remain open to allow drainage.
Interior air leakage: If warm indoor air leaks past the primary window, moisture condenses on the cold storm glass. Weatherstrip the primary sash to stop interior air infiltration.
Which Is Better for Storm Windows: Aluminum Wire or Fiberglass Mesh?
The right mesh depends on your climate and durability needs:
| Feature | Fiberglass Screen Mesh | Aluminum Wire Mesh |
|---|---|---|
| Durability | Flexible, won't dent if pushed | Rigid, can dent or crease under direct impact |
| Corrosion Resistance | 100% rust-proof and rot-proof | Can oxidize in salty coastal air unless coated |
| Visibility | High transparency, minimal glare | Moderate glare in bright sunlight (charcoal finish helps) |
| Ease of DIY Repair | Very easy to roll into spline grooves | Requires careful handling to avoid sharp edge cuts |
| Best Used For | Standard residential use and budget repairs | High-traffic openings requiring firm puncture resistance |